A firewall protocol is a security system for the internet that
can allow or disallow any user to enter the network. Configuring
firewall on Ubuntu Linux can allow both authorized and
non-authorized networks inside the core system based on your
firewall configuration. The firewall scans the packet data, whether
to enter the network or not. Mostly, the firewall is a security
system that prevents allowing unwanted networks. The firewall
creates a relation between the internal network and the public
network. On Ubuntu Linux, the firewall is a physical or virtual
device that monitors internet traffic and controls the incoming and
outgoing traffic based on the preordained configurations.
Firewall System on Ubuntu
Linux
On Ubuntu Linux, technically open ports are not available, so
the chances are notably low to get a firewall attack. Nevertheless,
it is always good to active the firewall on Ubuntu. As a Linux
user, you should also know the working mechanism of the firewall on
Ubuntu. If you use Secure Shell[1] (SSH), Samba, Apache
server, or other remote access
applications[2], then configuring the
Ubuntu firewall is a must recommended thing for you.
Because by using a firewall on your Ubuntu server or desktop,
you can allow or disallow which user or IP address you want to get
inside your network. You can also set the firewall configurations
for a specific IP address or any port. On Ubuntu Linux, it has the
host-based and network-based firewall configuration systems. In
this post, we are going to learn how to configure the firewall with
the Uncomplicated Firewall (UFW) on Ubuntu Linux.

Step 1: Installing the UFW
Firewall on Ubuntu Linux
Commonly every Linux distro has a firewall preinstalled inside
the system. You need to enable and activate the feature to get all
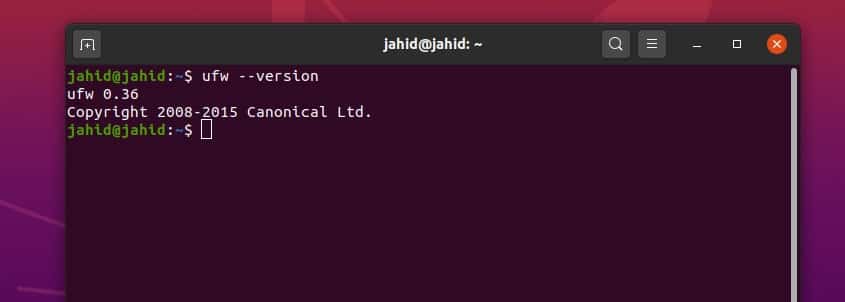
firewall privileges. You can check whether the UFW firewall is
installed inside your Ubuntu Linux or not by checking the firewall
version.
$ ufw --version
Furthermore, if you find no firewall is installed and configured
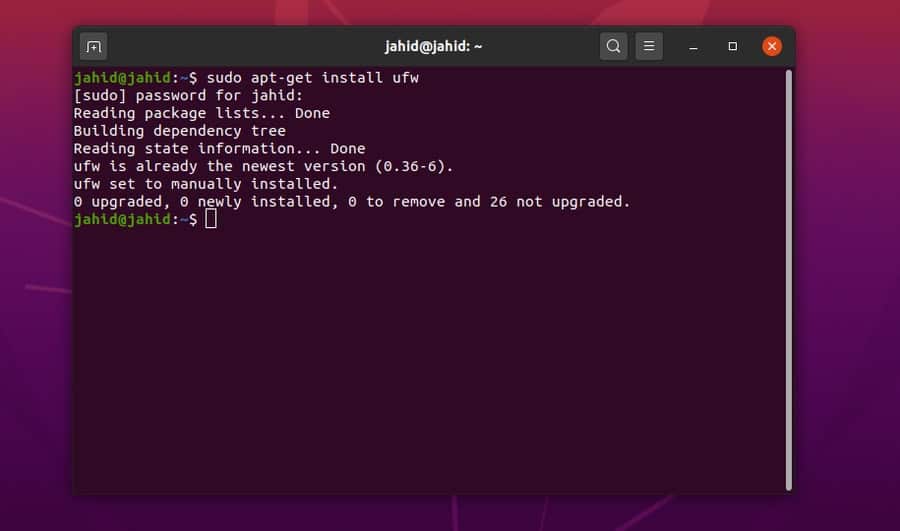
inside your Ubuntu machine, you can install the firewall with UFW
on your system. Before installing any software, it is always an
excellent step to update your Ubuntu repository. Then run the
apt-get the terminal command on your Ubuntu Linux to
install the UFW firewall.
$ apt update
$ apt upgrade
$ sudo apt-get install ufw
$ sudo apt install ufw
Step 2: Getting Started with
Firewall on Ubuntu
Once you are done installing the UFW firewall on your Ubuntu
Linux, you can now check the firewall status and which applications
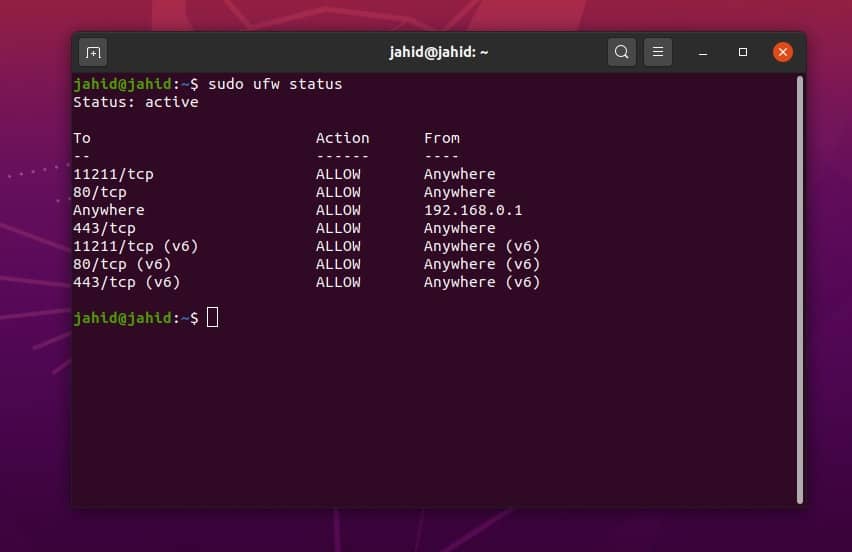
are currently using the firewall facilities. On the status list,
you will be able to see whether the UFW firewall is active or
inactive and, how many web addresses are going through firewall
security. You can also monitor the incoming and outgoing data
packets through the UFW firewall status.
$ sudo ufw status
$ sudo ufw app list
Now, here is the option where you have access to enable,
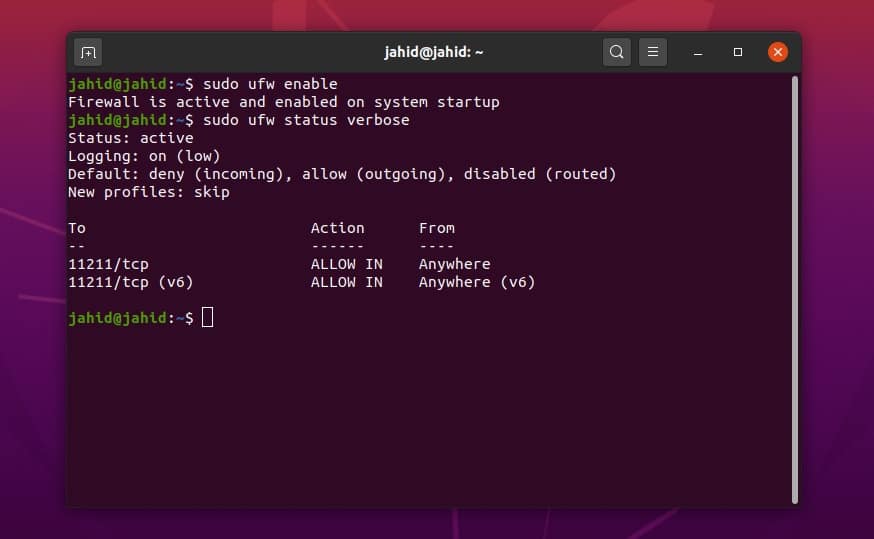
disable, and reload the firewall configuration on your Ubuntu. You
may use the verbose command to get more information about your
current firewall status. You will be able to check the network’s
path, allotment status, and the transmission protocol of running
networks.
$ sudo ufw enable
$ sudo ufw disable
$ sudo ufw reload
$ sudo ufw status verbose
Using the UFW firewall tool, you can print the list of
applications going through the firewall system on your Ubuntu
Linux. You may also allow the firewall permission to any specific
request through the UFW firewall. To get more information about
your firewall status, you need to log in to your firewall system.
You can also log out whenever you want. It will not affect the UFW
firewall configurations.
$ sudo ufw app list
$ sudo ufw allow 'Apache'
$ sudo ufw logging on
$ sudo ufw logging off
Step 3: Firewall Status on Ubuntu
Linux
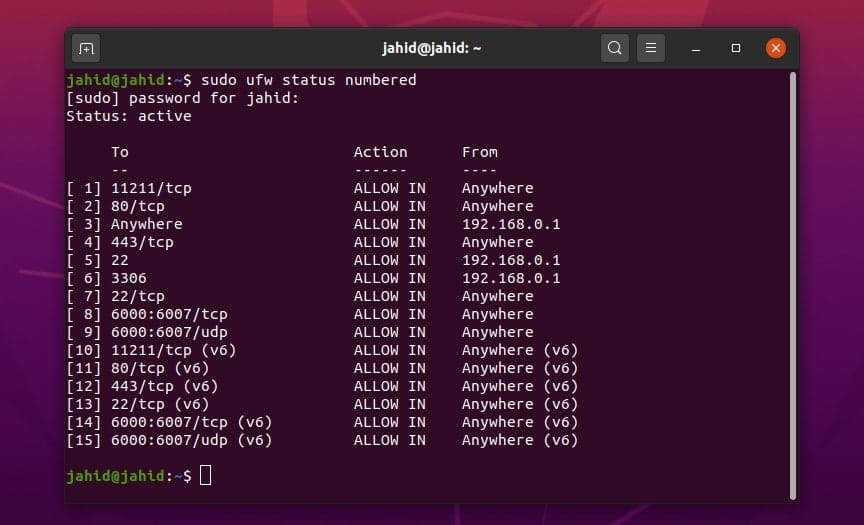
Here comes the section where you can get the actual numbered
status of the UFW firewall on your Ubuntu Linux. The numbered UFW
status gives you the summed up and an enlisted result of the
firewall usages. From this window, you can check the firewall
status, internet protocol, and network destination. You can also
disallow any network form the firewall access just by deleting that
specific number.
$ sudo ufw status numbered
$ sudo ufw status numbered
$ sudo ufw delete 5
Step 4: Allow or Disallow
Protocols from Firewall on Ubuntu
Internet protocols are the backbone of connecting networks with
each other. Your device has to go through a protocol to get
connected with other networks. Furthermore, the firewall protects
the protocols not to get interrupted. Ubuntu Linux has various
types of internet protocols that can be controlled with the UFW
firewall system.
You can allow and assigned Transmission Control Protocol (TCP)
connections against a port number. Alternatively, you can also
allow or disallow any specific IP address through firewall
configurations on Ubuntu Linux. Besides that, you can set rules for
the User Datagram Protocol (UDP) connections.
$ sudo ufw deny 56/tcp
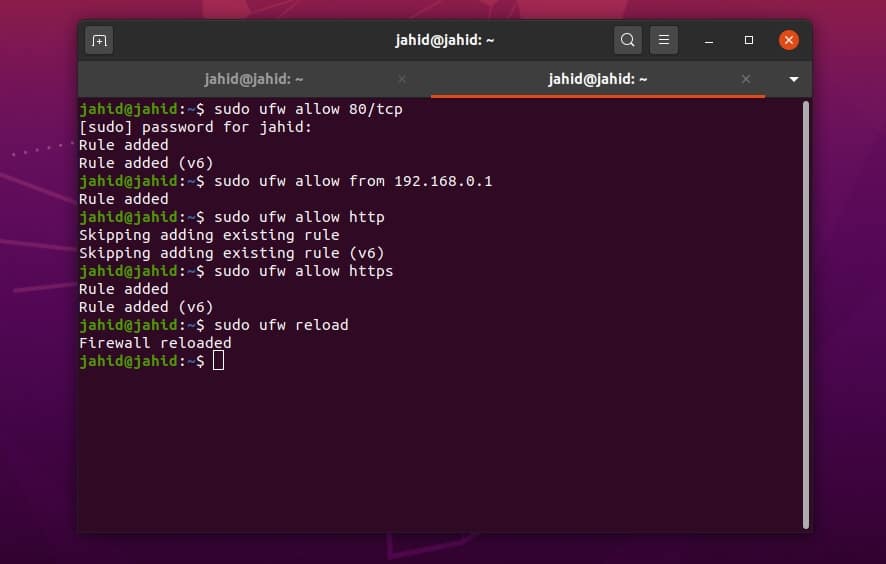
$ sudo ufw allow from 192.168.0.1
$ sudo ufw allow 6000:6007/tcp
$ sudo ufw allow 6000:6007/udp
As we were talking about allowing or disallowing network
protocols through the firewall configuration on Ubuntu Linux, here
is a pretty useful and handy method to allow all the HTTP and HTTPS
protocols. In the same way, you also disallow internet
protocols.
Moreover, if you want to reject all the incoming requests from a
specific IP address, you can do that too. On Ubuntu, the UFW
firewall allows the user to assign IP addresses and ports, whether
to be allowed or denied. After taking any firewall action, you need
to reload the firewall configuration on Ubuntu.
$ sudo ufw allow http
$ sudo ufw allow https
$ sudo ufw allow 80/tcp
$ sudo ufw allow <port>/<optional: protocol>
sudo ufw deny <port>/<optional: protocol>
$ sudo ufw deny http
$ sudo ufw deny from 203.0.113.4
$ sudo ufw deny 3306
$ sudo ufw allow from 192.168.0.1 to any port 22
$ sudo ufw allow from 192.168.0.1 to any port 3306
$ sudo ufw reload
To allow or deny all the incoming networks and outgoing data
packets, you can set specific rules to your Ubuntu UFW firewall
configuration. If you are a remote system administrator, you may
need to allow the SSH protocol to access your server or client’s
device.
$ sudo ufw default deny incoming
$ sudo ufw default allow outgoing
$ sudo ufw allow ssh
Step 5: IPv6 Configuration for
Firewall on Ubuntu Linux
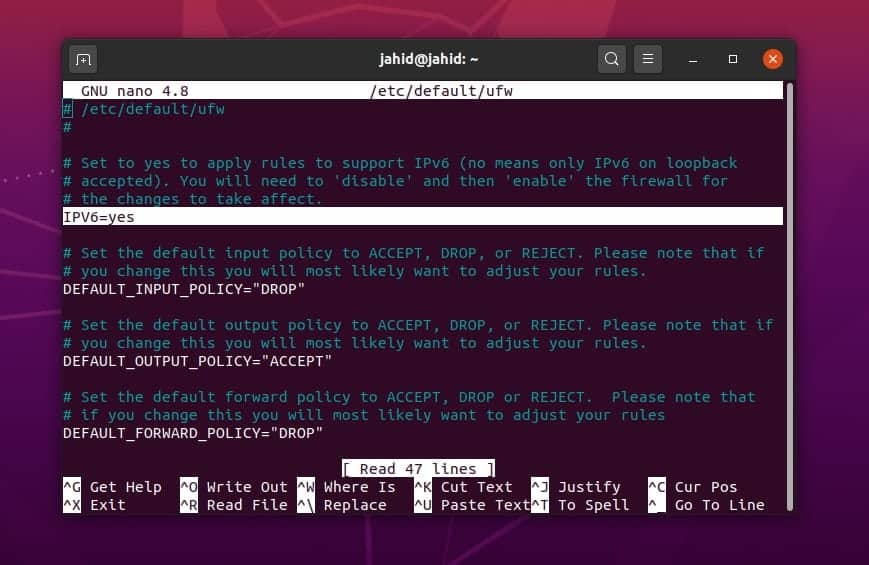
It would help if you opened the firewall configuration script
using any script editor[3]
to configure the IPv6 (Internet Protocol, version 6) on Ubuntu
Linux. In my case, I am using the Nano editor to edit and write an
IPV6 configuration. Once the script is opened in the script editor,
you must set the IPV6 to Yes. Then you may have to restart the UFW
firewall by disabling and enabling the firewall configurations on
your Ubuntu Linux.
$ sudo nano /etc/default/ufw
IPV6=yes
$ sudo ufw disable
$ sudo ufw enable
If you need to reconfigure all the UFW firewall configurations
on your Ubuntu Linux, you can use the simple terminal commands to
reset the firewall configurations on Ubuntu.
$ sudo ufw reset
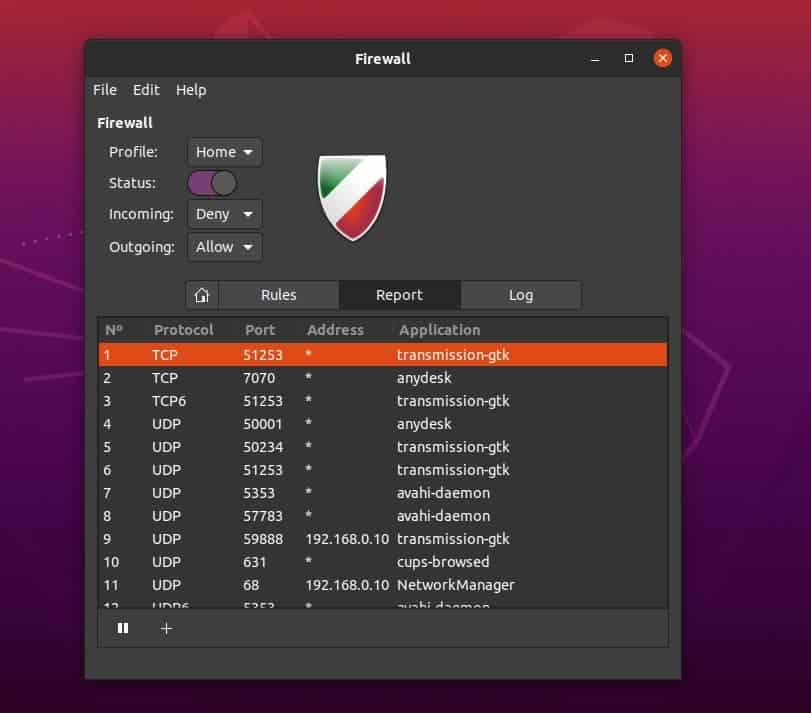
In this step, I will describe how to install and configure the
UFW firewall system on your Ubuntu Linux using the graphical user
interface (GUI) method. This method is indeed very easy and
straightforward to use. If you think that running terminal commands
are a bit complex task for you, then feel free to use the Graphical
Uncomplicated Firewall (GUFW).
The GUFW has a very smooth and clean user interface. You can
toggle a switch with a mouse click to turn on or turn off the
firewall. From the GUFW settings, you can monitor the protocols,
add or delete rules, and check the application lists.
Allowing and denying incoming and outgoing networks are easier
in GUFW than terminal command methods. Here is the download link of
GUFW for Linux users. You will download options for Debian, Linux
Mint, SUSE Linux and Arch Linux.
Final Thoughts
Before configuring the UFW firewall on your Ubuntu Linux, you
need to be sure whether the firewall system is required for you or
not. And if you genuinely need to configure the firewall, you may
additionally need to know which type of firewall is required to
protect your Linux system. However, let me inform you that the
firewall configuration cannot prevent internal network attacks and
trojan attacks.
In this post, I have described how to install and configure the
Firewall with UFW on Ubuntu Linux. If you are using the
iptables[5]
or the ebtables[6]
for internet security monitoring, then you must know that the
firewall is a very powerful daemon to protect your Linux
system.
However, configuring the UFW firewall in a wrong method can
block your regular internet connections and slow down your internet
bandwidth. So be careful while you’re configuring the firewall
system on your Ubuntu Linux. You can write down your experiences in
the comment section if you have used the UFW firewall on Linux.
Also, please share this post on your social media.
References
- ^
Secure Shell
(www.ubuntupit.com) - ^
remote access
applications (www.ubuntupit.com) - ^
Best
Linux Code Editor: Top 10 Reviewed and Compared
(www.ubuntupit.com) - ^
Download GUFW for Linux
(gufw.org) - ^
iptables
(www.ubuntupit.com) - ^
ebtables
(ebtables.netfilter.org)
Read more https://www.ubuntupit.com/how-to-configure-firewall-with-ufw-on-ubuntu-linux/