ConfigServer Security & Firewall (CSF) is an advanced, free, and
powerful opensource tool to manage and handle firewall protocols on
Linux. You can use the CSF tool to maintain your incoming and
outgoing IP addresses on your device. You can also use it to
configure the security & firewall settings on a webserver to
maintain internet traffic. You can configure the CSF settings with
the OpenSSH and SSH server. CSF can be installed and configured on
Red Hat Linux, Debian distributions, and most other Cloud-based or
Virtual Machines.
Install and Configure CSF on
Linux
As I have mentioned earlier that the CSF is open-source
software, so it is obvious that the ConfigServer Security &
Firewall is highly compatible with Linux. In CSF settings, the
interval time is set for five minutes, which means the firewall
will erase and start over the CSF configurations in 0-5 minutes
since the process is started.
It will help the user to clear all the previous firewall and security settings[1]. The user can allow any
IP and port address, disable operations and, restrict any protocol
to enter the network. Mostly you can analyze your inbound and
outbound networks on your Linux machine through the CSF tool. In
this post, we will see how to install and configure CSF on
Linux.
Step 1: Install Perl Library
Function
Perl programming
language was initially created to manage and automate the
serial tasks. Later the library function of Perl has been using to
make other programs smooth and efficient. In order to install the
CSF tool on Linux, we have to install the Perl library function
inside our machine. So, now we will install the Perl library on
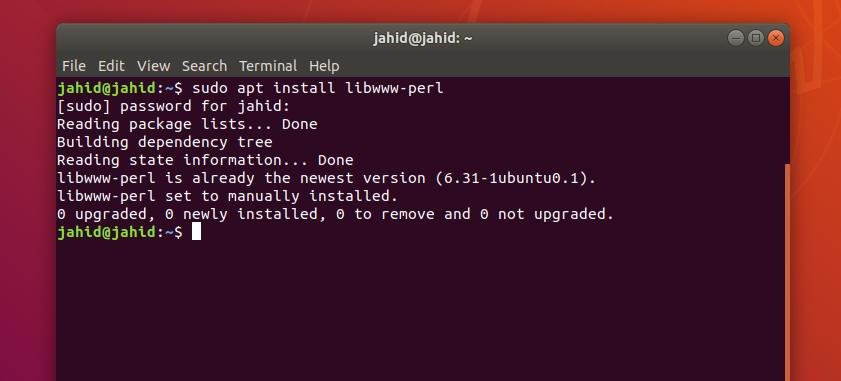
Linux. You can copy and paste the following terminal commands lines
given below to get the library on your Debian and Red Hat Linux.
[2]
Install Perl Library on Debian
Distributions
sudo apt install libwww-perl
Install Perl Library on Red Hat Linux
yum install perl-libwww-perl

Step 2: Download CSF For
Linux
Now, it is time to assign a path and download the CSF tool. The
assigned path will be the directory where the CSF can be installed
on your Linux filesystem. You can assign the path as the source
directory of your Linux distribution that is
usr/src.
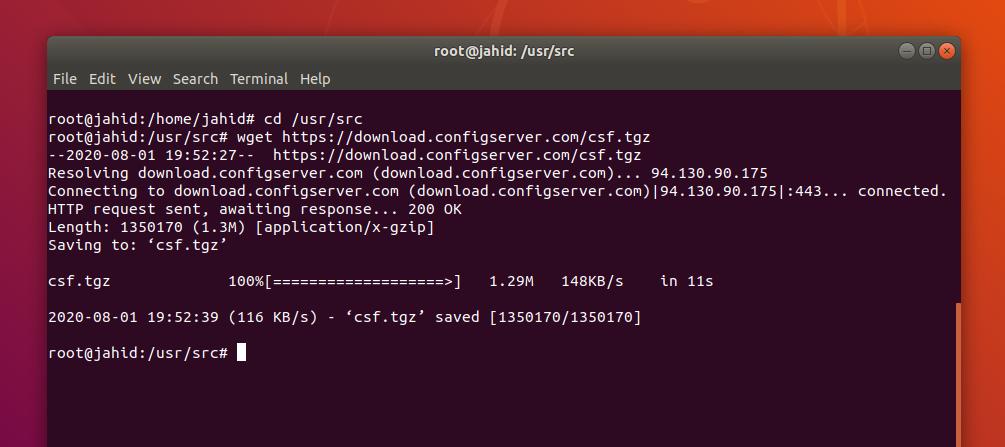
Then run the following wget command to download the
CSF tool in the destination folder. The file will be downloaded as
a compressed tape archive file (tgz) file. Later you have to
extract and install the file on your Linux system.
$ cd /usr/src
$ wget https://download.configserver.com/csf.tgz

Now extract the compressed file to make it ready to be
installed. You can either extract the file with your favorite
zip and unzip tools, or you can use the
following terminal command lines on your Linux terminal shell to
extract the file. [3]
$ tar xzf csf.tgz
$ cd csf
Step 3: Install the CSF Tool on
Linux
Once the Perl library function is installed, and the CSF file is
downloaded inside the system, you are now ready to install the
ConfigServer Security & Firewall in your Linux machine. To install
the CSF tool on Linux, we will run the following shell command in
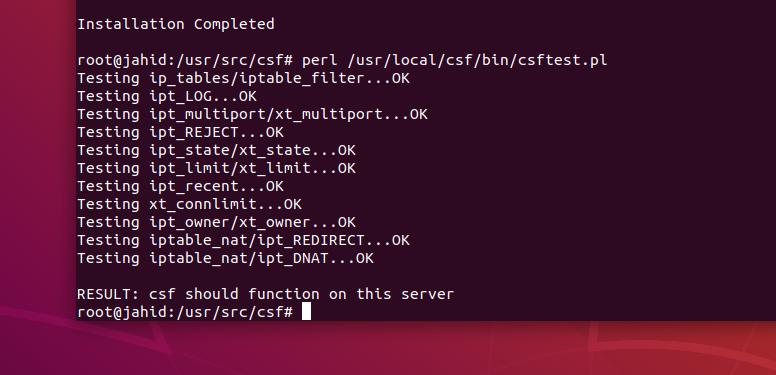
the Linux shell. When the installation is successfully done, you
will get an ‘Installation Complete’ message on your display.
$ sh install.sh
$ perl /usr/local/csf/bin/csftest.pl

Step 4: Remove Other Firewall
Settings
In every Linux distributions, there might be a firewall service
pre-installed inside your machine. To get started with the
ConfigServer Security & Firewall (CSF) on your machine, you need to
stop and disable the default firewall service of your Linux system.
If you are using the UFW[4]
on your Linux machine, use the following terminal command to
disable the Uncomplicated Firewall (UFW) on your machine.
$ ufw disable
If your system is using the Firewalld inside the machine, use this
terminal command lines to stop and disable the service. [5]
$ systemctl stop firewalld
$ systemctl disable firewalld
Step 5: Configure the CSF on
Linux
Here comes the basic part of configuring the CSF tool on Linux.
After the installation is finished, you can now do a little
configuration of the ConfigServer Security & Firewall. You can add
and allow ping monitoring, allow the UDP and TCP ports, and set the
internet control message protocol (ICMP) in the CSF configuration
script.
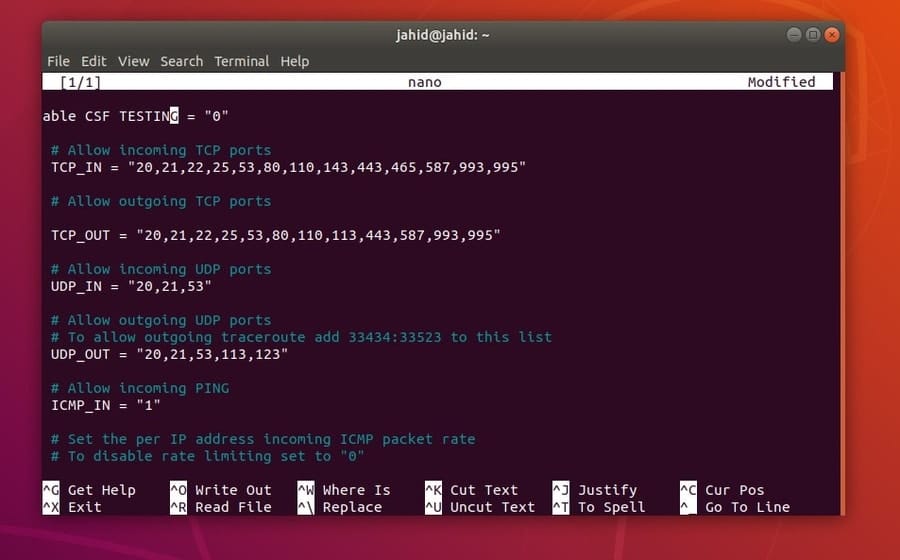
To do the configuration, you need to open the configuration file
of the CSF tool. You can use the Nano script editor to edit and
save the configuration settings. Use the following terminal command
line to open the configuration script.
$ nano /etc/csf/csf.conf
The basic settings are given below. Feel free to copy and paste
the settings.
#Enable CSF TESTING = "0"
# Allow incoming TCP ports
TCP_IN = “20,21,22,25,53,80,110,143,443,465,587,993,995”
# Allow outgoing TCP ports
TCP_OUT = “20,21,22,25,53,80,110,113,443,587,993,995”
# Allow incoming UDP ports
UDP_IN = “20,21,53”
# Allow outgoing UDP ports
# To allow outgoing traceroute add 33434:33523 to this list
UDP_OUT = “20,21,53,113,123”
# Allow incoming PING
ICMP_IN = “1”
# Set the per IP address incoming ICMP packet rate
# To disable rate limiting set to “0”
ICMP_IN_RATE = “1/s”
# Allow outgoing PING
ICMP_OUT = “1”
Step 6: Getting
Started with CSF
After installing and configuring the CSF on your Linux system,
you can now get started with the features of Configure ConfigServer
Security & Firewall. It’s so simple and easy to maintain the CSF
settings that if you are a newbie in Linux, you will be able to run
it. Some basic and primary CSF command lines are given below for
better understanding. The command lines are the same for all Linux
distributions.
Use this command to check the version of
CSF.
$ csf -v
Use this command to monitor the iptables
csf -l
Use these terminal command lines to start, restart, and
stop the CSF.
service csf start
service csf restart
service csf stop
Use these command lines to start, restart, stop, and
check the status of iptables
iptables start
iptables restart
iptables stop
iptables status
Besides these, you can also block or allow both incoming and
outgoing networks on your Linux system through the CSF tool.
Use this command to block any IP address.
csf -d 192.168.0.1
Using the CSF tool, you can block an IP address for a particular
time. Don’t forget to mention the time duration in seconds.
Use this command to block an IP address.
csf -td 192.168.0.1 3600
Use this command line to allow IP addresses on your
Linux machine.
csf -a 192.168.0.1
Use this command to allow an IP address for a particular
time.
csf -ta 192.168.0.1 3600
Use this command line to unblock an IP
address.
csf -dr 192.168.0.1 3600
Use this command line to unblock all
addresses.
csf -tf
Step 7: Remove CSF from
Linux
If earlier you have been using other firewall tools to protect
your Linux server[6], there is a chance that
you might want to switch back to your old firewall. You might know
that the CSF is actually not used as a firewall in a conventional
way. Here is the method, if you want to remove the CSF from your
Linux machine. All you need to do is just run the following
uninstall shell command in your Linux terminal.
$ /etc/csf/uninstall.sh
Final Words
You must think before you get your firewall configuration, which
kind of firewall do you actually need. If necessary, you can get
your dedicated hardware firewall, or even a router firewall might
work for home users. The firewall is not the ultimate solution for
your computer security. It can’t detect viruses and other malicious
attacks.
You must know that the CSF tool is not an antivirus[7], it’s a tool that can
protect the network system of your Linux machine. In the entire
post, I’ve briefly explained the working mechanism and how to
install and use the CSF on the Linux system.
If you have been looking for a tutorial on CSF on Linux, please
let us know how much this post helped you. Also, please share this
post with your friends and the Linux community. You can write down
your opinions in the comment segment. Thank you for visiting
Ubuntupit.
References
- ^
The 15+
Linux Firewall Software For Protecting Your Linux System
(www.ubuntupit.com) - ^
Perl programming language
(www.perl.org) - ^
zip and
unzip (www.ubuntupit.com) - ^
How To
Configure Firewall with UFW on Ubuntu Linux
(www.ubuntupit.com) - ^
Firewalld
(firewalld.org) - ^
20
Reasons Why You Should Choose Linux Server Than Any Other
Platform (www.ubuntupit.com) - ^
antivirus
(www.ubuntupit.com)
Read more https://www.ubuntupit.com/install-and-configure-configserver-security-and-firewall-csf-on-linux/
